Setting optical and lighting conditions
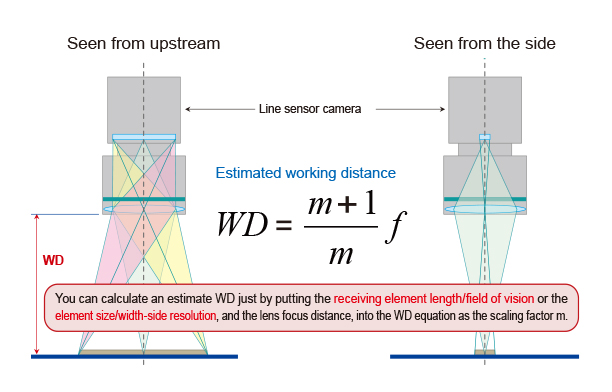
How to find the working distance (WD) * Reference value
Optical system for the line sensor camera
(Wide-side resolution)
It is necessary to calculate the working distance in advance.
Method for testing line sensor image input
When using a line sensor camera, calculate the working distance (WD), carrying speed, and scan rate before starting the test.
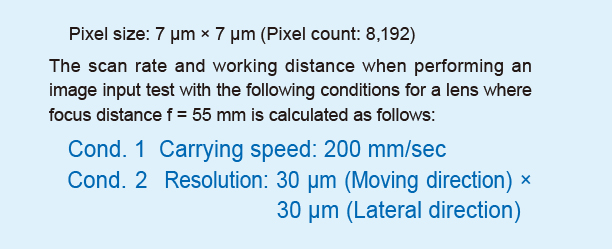
Example calculation with the following camera specs and conditions
Relationship between the lens' effective diameter and the Light Unit's installation distance * Reference value
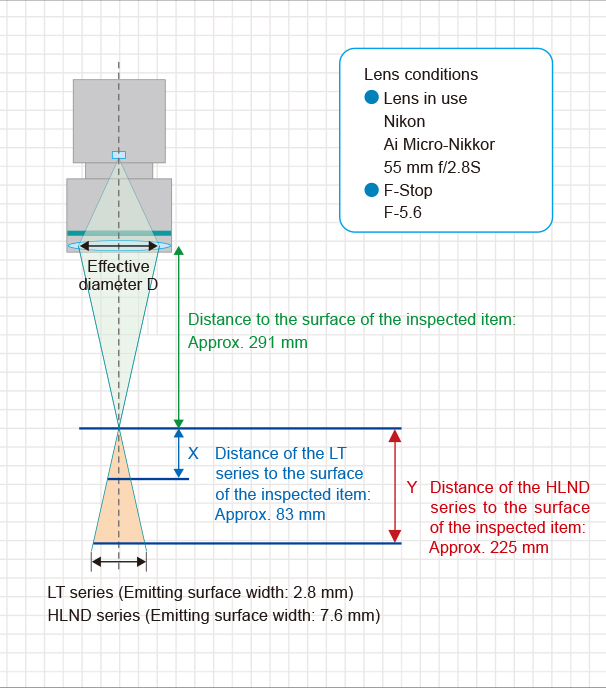
What is the effective diameter for the lens in the conditions on the left?

What is the longest distance where the most efficient brightness
can be achieved for the emitting width (short side) of each Light Unit?
⇒Find it using similar relationships
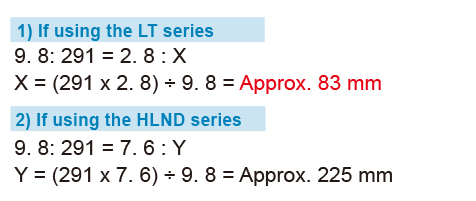
For both the above Light Units, if the Light Unit is farther than the distance above, it will be darker, but if the Light Unit is closer than the distance above, there will be virtually no change in the brightness. (However, this assumes that the inspected item is limited to something transparent where the illuminated light can be observed directly. This cannot be applied to an inspected item with a possibility for diffusion.)
Also, if the lens in use or the F-stop changes, various conditions such as the effective diameter and WD change. Therefore, please consider this only as a reference value under certain conditions. Furthermore, the camera's pixel size is a large factor regarding brightness.
Comparison of the images for the area sensor camera and the line sensor camera
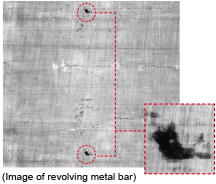
Imaging sample (Metal bar)
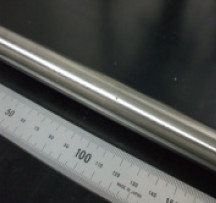
Image of scratches on a metal bar
○ Sample size: Length 150 mm, Ø20 mm
○ Resolution: 100 μm
○ Pixels of the camera in use
• Line camera: 8,192 pixels
• Area camera: 300,000 pixels
Imaging with the area sensor camera

Imaging with the line sensor camera